📑 Table of Contents
- ✅ Step 1: Intro & Overview
- ✅ Step 2: Content Uniqueness
- ✅ Step 3: Site Structure
- ✅ Step 4: Traffic & SEO
- ✅ Step 5: Tools & Pages Checklist
- ✅ Step 6: Design & Speed Optimization
- ✅ Step 7: Final Thoughts & Bonus Tips
🟢 Step 1: Introduction
Are you tired of repeated AdSense rejections? Wondering what it really takes to get your website approved? You're not alone. Most bloggers struggle with this, but here's a real success story: one blogger applied for AdSense on July 10th — and within just one day, he got approved. How? That’s exactly what we’ll uncover step-by-step in this article based on his video with SEO tips, images, and a checklist you can apply right now!
🟢 Step 2: AdSense Approval in Just One Day
One of the most common questions people ask is, “Why does my site keep getting rejected by AdSense?” To answer this, the blogger in the video shared his personal experience. He applied for Google AdSense on his website, Ranker.com, on the 10th and received approval within just 24 hours.
He even showed proof by logging into his AdSense and Gmail accounts, demonstrating that ads had started appearing on his live site. While many believe it takes months to get approved, this proves it can happen quickly if you do the right things.
💡 Tip: This article is based entirely on that video and his real-time walkthrough making it practical and trustworthy.
🟢 Step 3: Learn from Real Blogging Communities (Optional but Helpful)
If you're feeling stuck with repeated AdSense rejections, sometimes it helps to learn from others who’ve faced the same challenge. The YouTuber featured in this article shared that he’s part of an active Telegram blogging community with over 10,000 members. These types of forums are often great for sharing experiences, asking questions, and connecting with people who understand your struggles.
⚠️ Important Note: Always verify the tips you receive in online groups before applying them to your website. Follow only ethical practices that comply with Google AdSense Program Policies.
You can explore such communities at your own discretion. If you’d like to learn directly from the source, the full video is linked below — it provides practical insight and real-time examples that might motivate and guide you further.
🟢 Step 4: Real Proof of Approval – Busting Common Myths
To back up his claim, the YouTuber shared live proof of his AdSense approval. He opened both his AdSense account and Gmail inbox to show that the website Ranker.com was successfully approved and that too within just 24 hours of applying.
Many beginners believe that Google AdSense approval is only possible after months of content building and waiting. But this real example proves that, if your website meets all quality requirements, fast approval is very much possible.
💡 Myth Busted: "You need 100+ articles to get approved."
✅ Reality: His website had just six blog posts but all were original, well-structured, and informative.
This proves that quality matters more than quantity. A well-optimized, clean website with a few high-quality posts can still make it through the approval process.
🟢 Step 5: The 18-Point AdSense Approval Checklist (Explained)
One of the most valuable parts of the video was the creator’s 21-point AdSense checklist — a personal blueprint he followed to get approval in just one day. These steps are based on his own experience and aim to maximize your chances of success.
Here’s a breakdown of the most important items from that checklist:
✅ 1. Unique, Plagiarism-Free Content
Every blog post must be 100% original. Avoid AI-generated or copied material. Share your own insights and structure your articles naturally.
✅ 2. Minimum 1000+ Words per Post
Each article should be comprehensive. Aim for at least 1000 words, but going up to 1500–2000 words is ideal — just like he did.
✅ 3. Well-Structured Blog Layout
Don’t just publish random posts. Structure your blog with:
- Categories that make sense
- Clean menus/navigation
- No “empty” sections or dead links
✅ 4. No Copyrighted Images or Content
Use your own images or copyright-free resources. Even better: edit or customize images to make them look unique.
✅ 5. No Pop-ups, Redirects, or Heavy Ads (Initially)
Before getting approved, avoid pop-ups, third-party ad scripts, or any redirect behavior that disturbs user experience.
💡 The full checklist also includes elements like: About Us page, Contact page, Privacy Policy, Terms & Conditions, Sitemap, robots.txt, SSL certificate (HTTPS), and fast-loading pages — all of which we’ll explore in the next steps.
✅ Step 6: Use a Simple, Clean, and User-Friendly Website Design
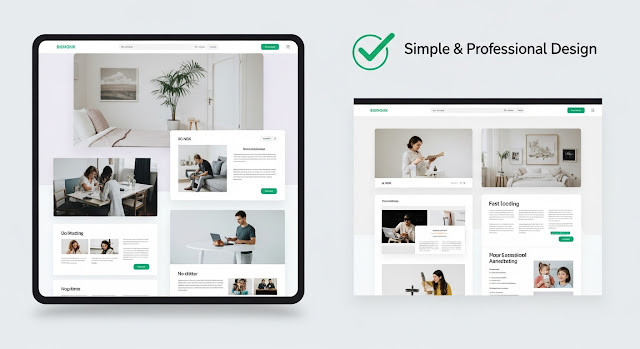
Website design plays a crucial role in AdSense approval. Many websites get rejected because their layout is messy, overloaded with widgets, or filled with distractions.
🟩 Key Advice:
- Use a clean theme with a minimal layout.
- Avoid unnecessary popups, animations, or flashy banners.
- Make sure your navigation is smooth and clear for both users and Google crawlers.
🎯 Why this matters:
Google wants a good user experience. A site with a clean UI:
- Loads faster
- Keeps visitors engaged longer
- Builds trust and credibility
💡 Important Point from the YouTuber:
He emphasized that there is no magical theme that gets you approval. But simplicity is the best approach. Use less side widgets, avoid clutter, and don’t rely on design gimmicks. Let your content shine.
✅ Step 7: Add Active Social Media Links to Your Website
A professional-looking website must have links to active social media profiles. This not only builds trust with your visitors but also shows Google that your site is genuine, active, and has a real presence beyond just content.
🟩 Key Tips from the YouTuber:
- Make sure to add social media icons/links (e.g., Facebook, Twitter, YouTube, Telegram) to the footer or header of your site.
- Don’t just create social accounts the day you apply for AdSense.
- Ensure these social profiles are active with a few posts, even if you only have 10–15 followers.
💬 He also mentioned that although two of his social links were broken, he advised fixing them before applying.
🎯 Why this matters:
- Google uses multiple trust signals. Active social media pages help confirm that the website is run by a real person or brand.
- It improves site authority and user interaction.
✅ Step 8: Generate Some Real Traffic Before Applying
One of the most overlooked but critical factors in getting AdSense approval is having some real, organic traffic on your website before you apply.
🟩 What the YouTuber Emphasized:
"My site had minimal traffic — around 1000–2000 visitors monthly — but that was enough for AdSense approval. However, I still suggest building some audience first."
🔍 Why Traffic Matters:
- Google wants to know that your site is active and discoverable.
- Even low but consistent traffic proves that people find your content helpful.
- Having some impressions and clicks in Google Search Console or Analytics strengthens your credibility.
📌 Recommended Minimum:
- Try to have at least 30–50 daily visitors before applying.
- Make sure Google Search Console is active and showing impressions.
💡 Pro Tip:
Even if your traffic is low, if your content is valuable, original, and solves problems, you still stand a strong chance.
✅ Step 9: Make Sure Your Website Navigation Is Clean and Logical
Website navigation is one of the most important user experience factors Google considers during AdSense review. A messy or broken navigation bar can directly lead to rejection.
🟩 What the YouTuber Explained:
“Many people create too many categories with just 1 or 2 posts in each. That looks incomplete and unprofessional. Keep it simple!”
🎯 What You Should Do:
-
Use a simple main menu with only important pages like:
- Home
- Blog
- Contact Us
- About Us
- Tools (if any)
- Avoid empty categories or sections with no or very few articles.
- Every clickable item in the navigation should lead to a working, informative page.
💡 Why it matters:
Google reviewers (and bots) check if your website is easily usable, especially for mobile visitors. If it looks incomplete or confusing, your chances of rejection increase.
✅ Step 10: Ensure Your Website Loads Fast and Has No Technical Errors
Website speed and technical performance are crucial ranking and approval factors for Google AdSense. A slow or glitchy website creates a poor user experience and can negatively affect your approval chances.
🟩 What the YouTuber Advised:
“I used the LiteSpeed Cache plugin to improve my website’s loading speed. You can find tutorials on YouTube that show how to optimize with just a few clicks.”
🎯 What You Should Do:
- Use LiteSpeed Cache, WP Rocket, or any reliable caching plugin (for WordPress).
Test your website speed on:
PageSpeed Insights- GTmetrix
Make sure:
All images load properly (no broken image links).- Animations (if used) are smooth and not buggy.
- No unnecessary redirects or scripts are slowing down the site.
Use a simple, lightweight theme and compress your images before uploading.
Avoid auto-playing videos or heavy pop-ups.
✅ Step 11: Create All the Required Legal & Informational Pages
Having complete legal and informational pages is mandatory for Google AdSense approval. These pages show that your site is transparent, trustworthy, and user-focused.
🟩 What the YouTuber Mentioned:
“I used ChatGPT to write my Privacy Policy, Terms and Conditions, and Refund Policy — then I customized them according to my website. These are extremely important!”
🎯 Essential Pages You Must Have:
- Privacy Policy – Explains how user data is collected and used.
- Terms and Conditions – Defines usage terms for your website.
- Refund & Return Policy – If you sell anything (digital or physical).
- Contact Us – Must be working with a functional form or email.
- About Us – Tells who you are and what your site is about.
- Disclaimer (Optional but recommended)
💡 Pro Tips:
-
Place these links in the footer so they’re accessible from every page.
-
Make sure all pages are indexed, readable, and not blank.
-
Use simple English and be honest about your policies.
✅ Step 12: Set Up Technical Files Properly (robots.txt, Sitemap, HTTPS)
These technical elements help Google understand and crawl your site efficiently. Missing them may cause AdSense to think your website is not ready.
🟩 What the YouTuber Emphasized:
“Make sure you have a robots.txt file, sitemap, and secure HTTPS connection — these are the basics, but people still forget them.”
🎯 Here’s What You Need:
-
robots.txt file
- Tells search engines what to crawl and what not to.
Example:
- Can be auto-generated by SEO plugins like Rank Math or Yoast SEO.
XML Sitemap
Helps Google discover all your site pages.- Submit it in Google Search Console.
HTTPS (SSL Certificate)
Your site must be served over HTTPS (green padlock).- Usually free with most hosting providers (via Let’s Encrypt).
- 💡 Why This Step Is Important:
- Without these technical basics:
- Your pages may not get indexed.
- Googlebot may not access your site properly.
- Your site may appear unsafe to users and bots.


